Let’s say you were a bit stingy or you simply didn’t have the budget for that pop filter. You were too lazy to build one yourself out of a hanger wire and your girlfriend’s (or your mom’s) old tights. Not only that you couldn’t bother with the proper mic positioning, technique and proximity adjustments…orrr just like in my case, you were only recording a throw away guide vocal track without giving a crap but somehow you ended up capturing a good vibe and now you’re stuck with a track that has a great performance and all the pops, hiss, chair cracks, computer monitor humming and whatnot.
Before you dive into your go-to toolbox, meaning your “Plugins Folder”, and you pull out an amazing EQ or De-Esser that your brother landed you (come again?), hold on a second. Sure, all that may help you to a point but nothing beats an old-fashioned tailoring act on each one of those tracks.
Only your mouse and your index finger are required. Yes, it is boring and may take forever but the results will be more natural, organic in a way, than any plugin may give you. Sure, you may not fix everything this way especially if your “t”s and “s”s are nothing more than a chunk of distortion that takes away the consonants all together when you crop it but that’s when you can either perform the bit all over again or use a magical plugin of your choice.
If you’re new to editing signals it may be a bit frustrating in the beginning when you can’t get the exact sounds you were hoping at every click but don’t quit because the more you keep at it the more familiar you will get with the signal waves, what they mean, where to chop, where to increase or decrease the volume and what shapes to use to be able to do that.
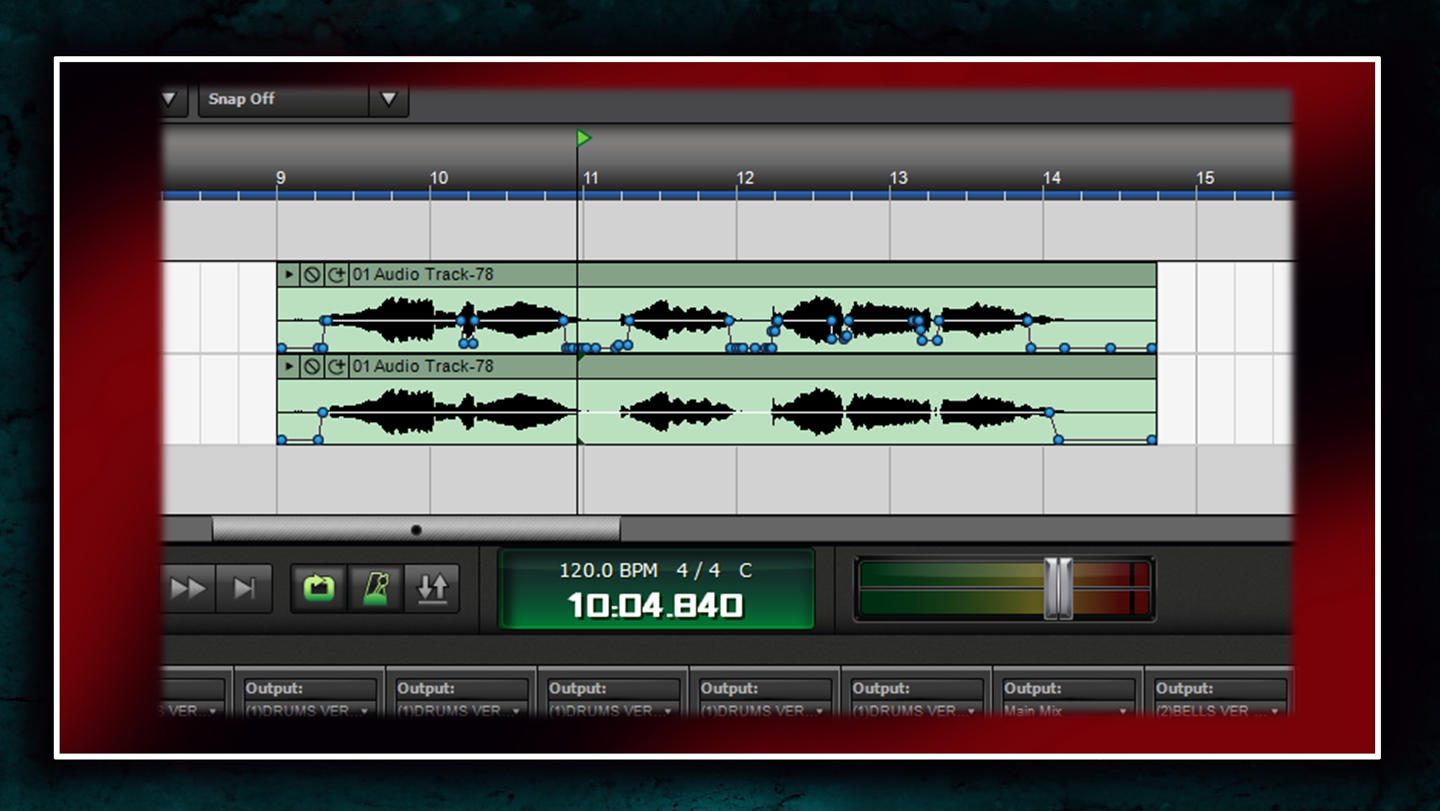
Here’s an example of how I fix the vocal track noises in my Digital Audio Work Station.
What was very surprising to me was realizing how easy it was to fix some hopeless sounding noises. I mean I was sure that I would have to go and sing all the parts again but with a few moves I ended up with tracks that were clean as a whistle.
One tip, try not to cut off any teeth and tongue noises, rather, spot them, mark them and reduce the volume drastically at first and increase it bit by bit and test it until you’re pleased with the overall sound. Test it at different volumes. When your monitors are quiet “s”s may seem under control but when you bring the level up, they may show up again. If there are several backing tracks using the same words, they all must be cleaned up and tested together.
A good idea would be choosing a track or two whereby it is okay for those trouble consonants to be present and then getting all the other backing tracks rid of those consonants or any consonant for that matter, if you’ve got the time and patience for it.
After all that bring in all the instrument tracks and see how the vocal tracks hold up against them. The chances are you’re going to have to do more adjustments to make them sit in well within the overall sound. But hey, that’s what mixing is all about, right? Constant trial and error.
Mix on, my friends.
G